Shock Setup Service
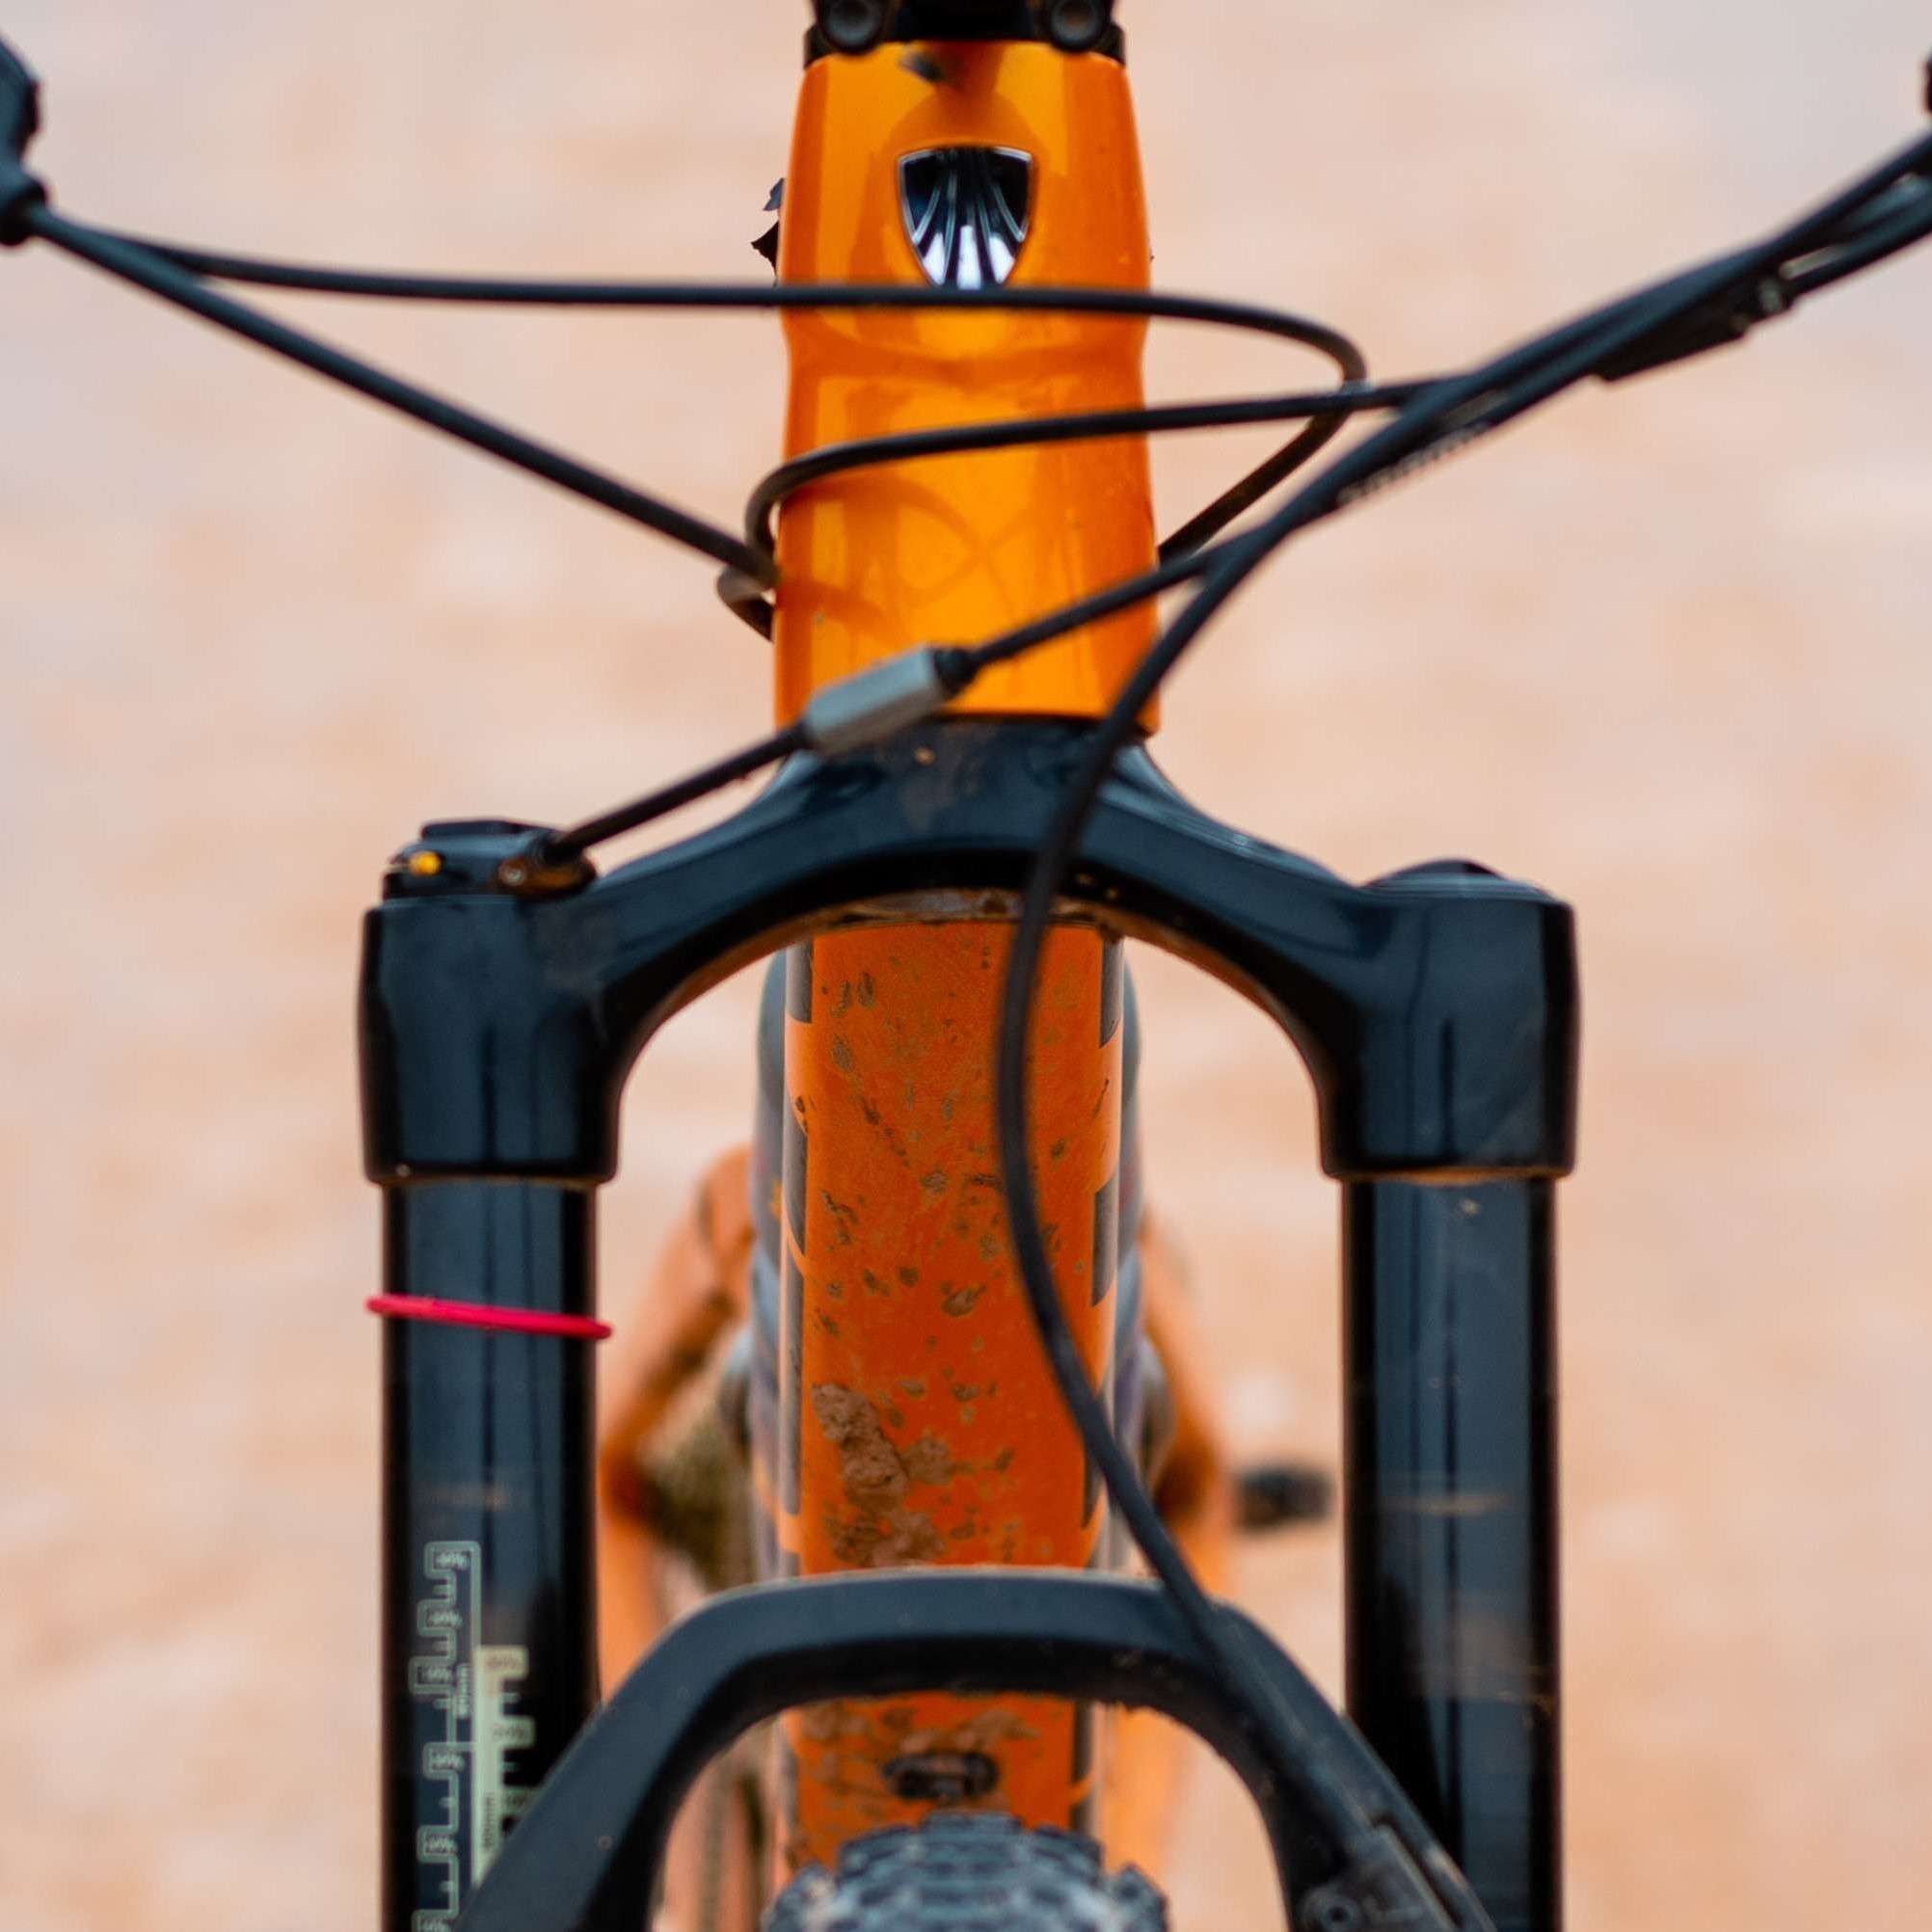
Front Suspension Setup:
Helps to have an assistant. (we can help with that)
- Cycle the fork up and down to equal out the negative and positive spring and free up the seals.
- Standing in the attack position have your assistant slide the rubber O-ring on the fork stanchion down to the rubber wiper seal.
- Rock your weight back and dismount from the bike without pushing down on the suspension so the o-ring stays where it is when you are in your attack position.
- Measure the distance the o-ring has been pushed up from the wiper seal in mm. Divide this number by the total travel (eg 160 mm) and then x 100 to get the percentage sag.
- To achieve the correct sag, add or remove air from the air-spring as needed and repeat.
Most manufactures have a front sag of 25-30% check with your fork manufacture.

Rear Suspension Setup:
Helps to have an assistant. (we can help with that)
- Bounce firmly up and down to charge the negative spring and free up the travel.
- Assume your normal seated position and after allowing the bike to settle for at least 5 seconds have your assistant push the rubber O-ring on the shock stanchion up (or down) to the rubber wiper seal.
- Carefully rock your weight forward and dismount from the bike without disturbing the O-ring.
- Measure the distance the O-ring has been pushed up from the wiper seal in mm.
- Divide this number by the total shock stroke (often less than the physical shock shaft length, check in your bike manual) and then multiply by 100 to get the percentage sag, e.g. (15 mm / 50 mm) x 100 = 30%.
- To achieve the correct sag, add or remove air from the air-spring as needed and repeat.
Most manufactures have a sag of 25-30% check with your Shock manufacture.
Suspension setup is important, here's why
Suspension setup and functioning correctly can make or break how a bike rides.
A poor setup can be the difference between a great ride and a horrible one.
Basic Suspension info:
Pressure = suspension ride height, gives you the support (top of travel) Based on rider weight. The amount of pressure is based on the suspension design, rider weight and riding style. Pressure is the spring, it determines how the suspension will handle bumps and hits.
Dial in reverb and compression from full closed (slow) - only use compression as a last result. Reverb is the speed that the suspension returns after taking an impact. How quickly it returns to neutral.